cmm BRIDGE | universal

CMM bridge | universal
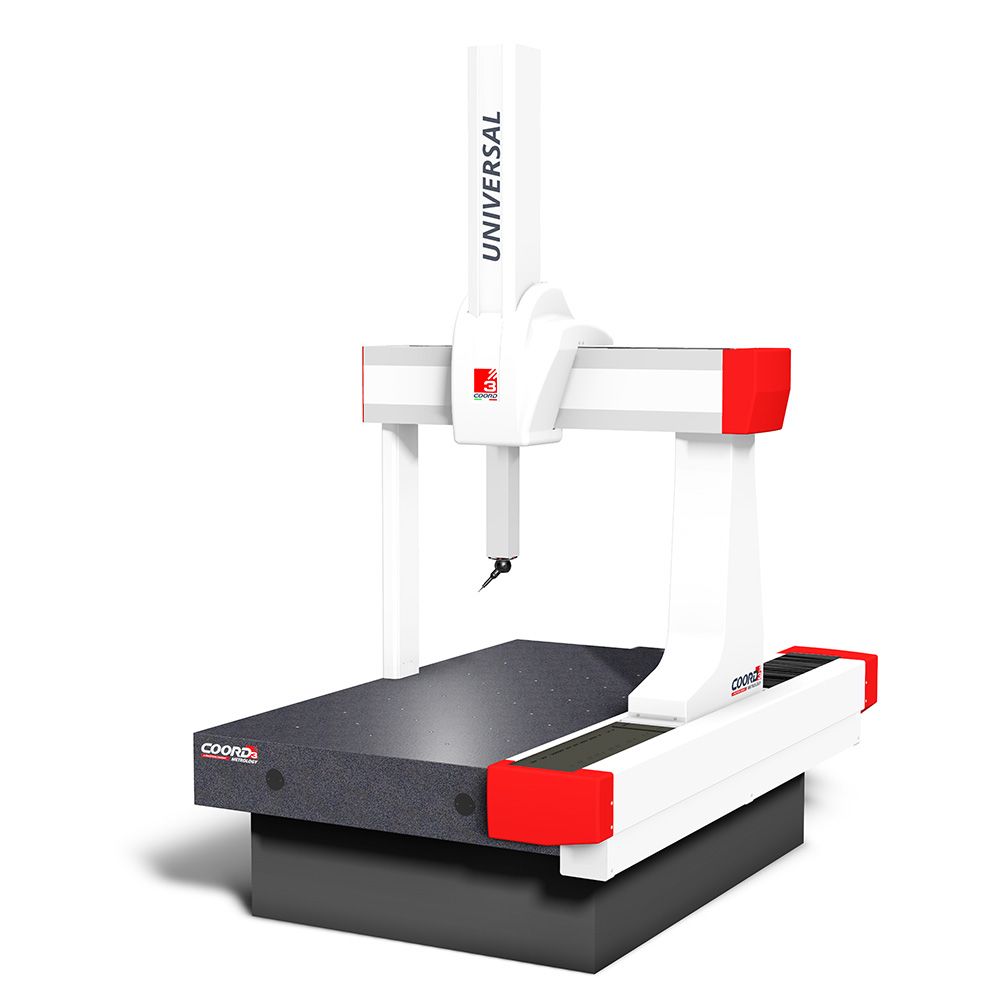
The UNIVERSAL series represents the ultimate generation of CMMs.
It is perfectly suitable both for traditional point-to-point measurements and for more sophisticated contact scanning and laser scanning cycles. Thanks to its outstanding structural rigidity, the UNIVERSAL range is an ideal platform for 5-axis scanning systems and gear measurement applications.
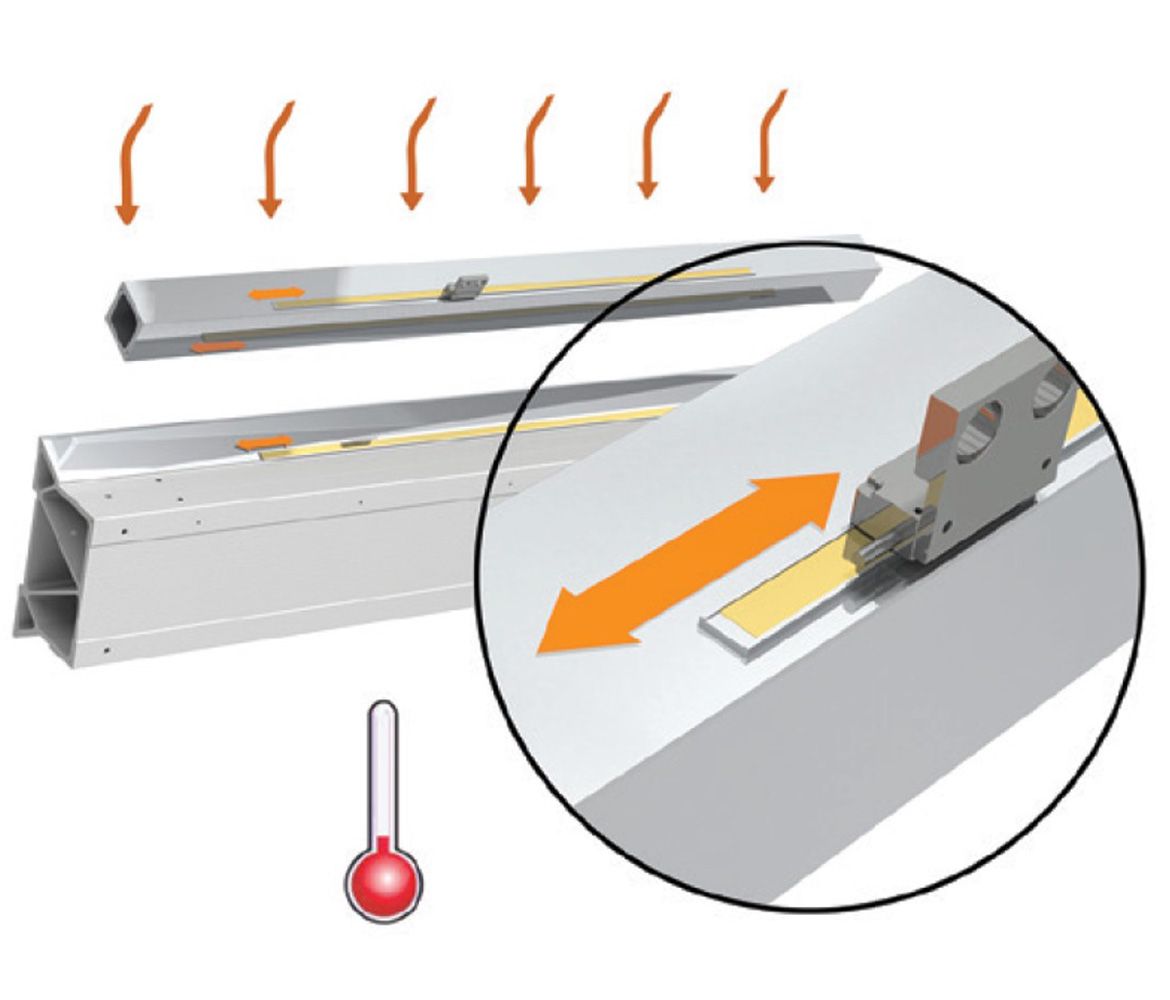
The COORD3 UNIVERSAL range offers the first CMM on the market equipped with wireless thermal compensation system. This fully automatic system dynamically compensates for changes in CMM operating environment in a temperature range from 16°C to 26°C. In addition, the use of high-resolution (0.1 μm), free-floating optical linear scales eliminates any distortion due to deformations of the main structure.
CMM universal
- Ultra rigid alloy CMM platform provides maximum stiffness for scanning applications
- Structure highly responsive to any ambient temperature change
- FEA designed bridge beam extrusion provides optimum moment of inertia for minimum deflection operating at high accelerations
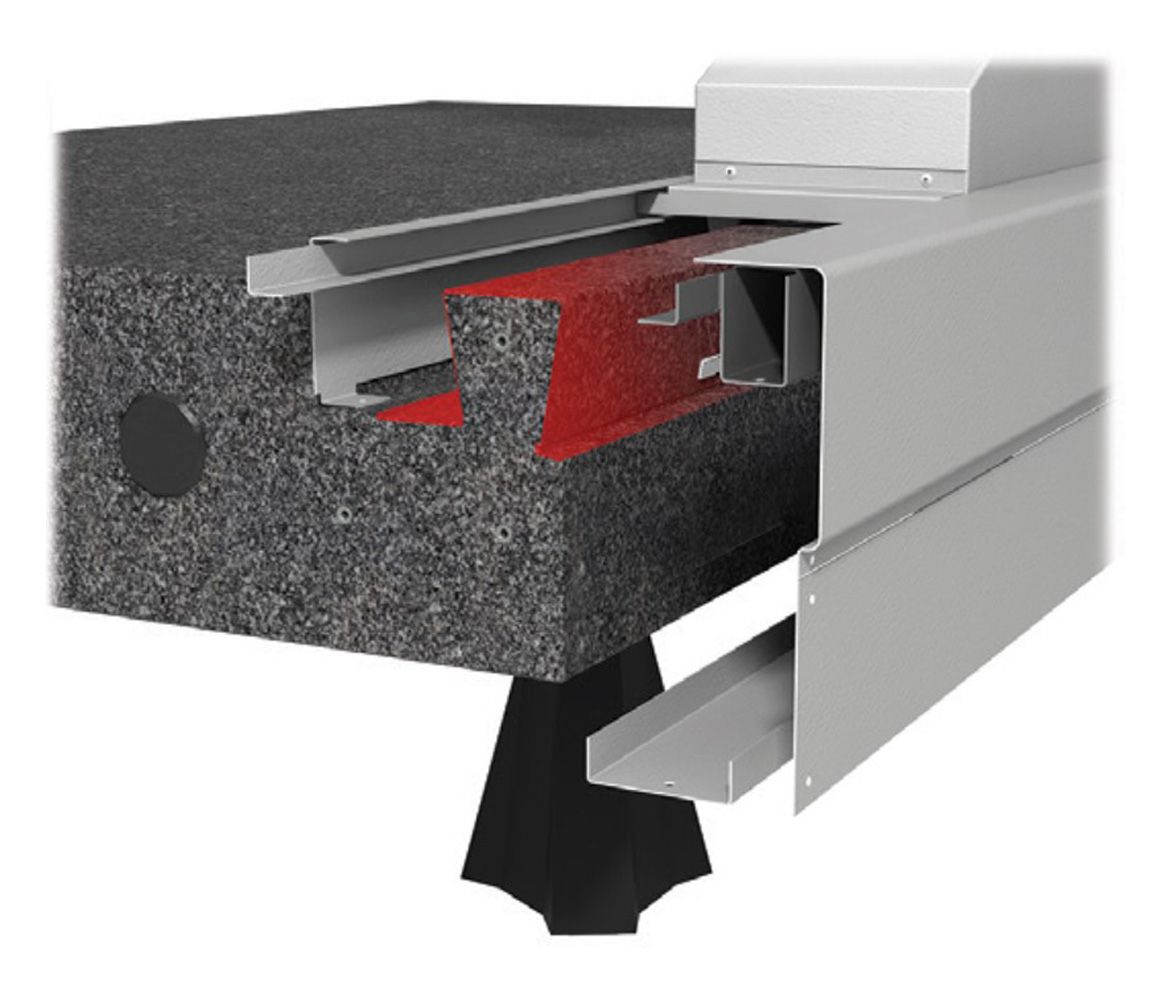
- Monolithic granite base plate with integral Y dovetail guide-way
- M8 threaded table inserts in generous grid pattern
- Sliding system on air bearings with ultra-rigid isostatic support on all measuring axes
- Pneumatic Z-axis counterbalance
- High-resolution optical linear scales (0.1 micron) mounted in carriers with dynamic signal processing
- Full digital motion control with probe path blending for optimized CMM performance
- Zero hysteresis toothed belt drives to all axes
- Passive vibration damping system to isolate external vibrations
- Easy access to the measuring area
- Maximum positioning Speed 866mm/sec
- Maximum acceleration 1500mm/sec2
- Nominal temperature: 20°C
- Metrological temperature range: 18 – 22°C (Extended range: 16 – 26°C)
- Maximum temperature gradients allowed: 0.5°C/hours – 2°C/24 hours (extended range 5°C/24 hours)
- Operating temperature range: 15 – 35°C
- Relative humidity: 40 – 80% (non-condensing)
- Acceptable Vibrations: 30 mm/sec2 1-10Hz | 15 mm/sec2 10-20Hz | 50 mm/sec2
20-100Hz
- Minimum air supply: 5 Bar -72PSI
- Air consumption: 100Nl/min
- Power supply voltage: 230v 50Hz or 110v 60Hz
- Maximum power consumption: 10A 1200W
- Silicon carbide Z-axis column enhancing further CMM stiffness
- 0.1 micron resolution free floating measuring scales
- Dynamic wireless thermal compensation system including part temperature sensor
Each COORD3 CMM is factory-tested according to the UNI EN ISO 10360 – 2 standard
UNIVERSAL 07.07 – 09.08 – 10.08

The services indicated are valid under the following conditions:
– PH10M/PH10MQ/PH20/TP20/TP200: stylus Ø4mm x 10mm
– PH10MQ/SP25: SM1, stylus Ø 5mm x 50mm
– REVO: RSP2/RSH175-RSP3-1/SH25-1, stylus 20mm
– L= measuring length in mm
– Ambient temperature conditions:
T1 : 18÷22 °C; Degrees max: 1,0 °K/h – 2,0 °K/24h – 1,0°K/m
T2: 16÷26°C; Degrees max: 1,0 °K/h – 5,0 °K/24h – 1,0°K/m
[1] Maximum Permissible Error on length measurements according to ISO 10360-2
[2] Maximum permissible point gripping error according to ISO 10360-2
[3] Maximum Permissible Error of scanning point gripping according to ISO 10360-4 for SP25M / SP80 probes, sphere Ø 25 mm – REVO RSP3-1
UNIVERSAL 10.09 – 10.10 – 15.10 – 15.13

The services indicated are valid under the following conditions:
– PH10M/PH10MQ/PH20/TP20/TP200: stylus Ø4mm x 10mm
– PH10MQ/SP25: SM1, stylus Ø 5mm x 50mm
– REVO: RSP2/RSH175-RSP3-1/SH25-1, stylus 20mm
– L= measuring length in mm
– Ambient temperature conditions:
T1 : 18÷22 °C; Degrees max: 1,0 °K/h – 2,0 °K/24h – 1,0 °K/m
T2: 16÷26°C; Degrees max: 1,0 °K/h – 5,0 °K/24h – 1,0 °K/m
[1] Maximum Permissible Error on length measurements according to ISO 10360-2
[2] Maximum permissible point gripping error according to ISO 10360-2
[3] Maximum Permissible Error of scanning point gripping according to ISO 10360-4 for SP25 / M / SP80 / REVO probes, sample sphere Ø 25 mm – REVO RSP3
- Automatic multi-probe thermal compensation
- Active safety system with volumetric scanners
- Pneumatic Vibration Isolation System
- Air Dryer
- Modular Parts Fixturing Kits
- CMM Modular Enclosure
- Modular protection box
- Models and sizes
COORD3 UNIVERSAL CMMs are available with the following measuring strokes (Y.Z mm)
7.7 | 9.8 | 10.8 | 10.10 | 12.10 | 15.10 | 15.13


request a visit from one of our agents


Strada Statale 25, n°3 – 10050 – Bruzolo (To) – Italy
PHONE
+39 011 963 5511
TECHNICAL ASSISTANCE
service@coord3.com
COMMERCIAL SUPPORT
info@coord3.com
ADMINISTRATION
finance@coord3.com
PURCHASING OFFICE
acquisti@coord3.com
© 2023 COORD 3 S.R.L. | Via XX Settembre, 26 – 00187 Roma (RM) - Italy | REA C.C.I.A.A. N. 1667509 Roma - Capitale sociale versato: Euro 50.000,00 | P.IVA\C.F: 11287420019 | SDI ZBGTBLC | ISO 9001 Certified | Privacy Policy | Cookie Policy


